Thursday, April 25, 2013

Getting you started on a new fruit tree


Now is the time!

Buy a couple of fruit trees and grow them
along a fence, a building, a wall. 
  It's not hard to do but MUST 
be started in a young tree.

It's not a big project
prepare the supports and 
Just do the follow up trimming and tying 
and you will have fruit in not too many years.


This is not a new way to grow fruit trees
In fact it is very old 
and these directions came out
of 
a very old sunset book. 

Apples trees usually are trimmed with only 5 main branches
so this is a logical use for apples.  
Consider plum, and pears also, though
any fruit tree can be trained this way.

You need to buy your tree in it's first or early second year in order
to start with a pliable tree.

Start with a sturdy support, all ready to go.  
You will not want to be building around the training plant.

Yes this takes 5 to 10 years to get smoothly trained but so 
do the big trees!

So with a couple of fruit trees, a couple of blue berry
plants and a few pots of veggies you have an
instant start to gardening.

Blue berries need another bush that blooms when it does,
Early with Early
Mid season with Mid season
Late with Late season.
There can be some cross over of seasons with success.

Pears need another pear tree to produce. 

Enjoy


Saturday, June 23, 2012

growing potatoes in cans and having problems


It was time for more potato cans... 

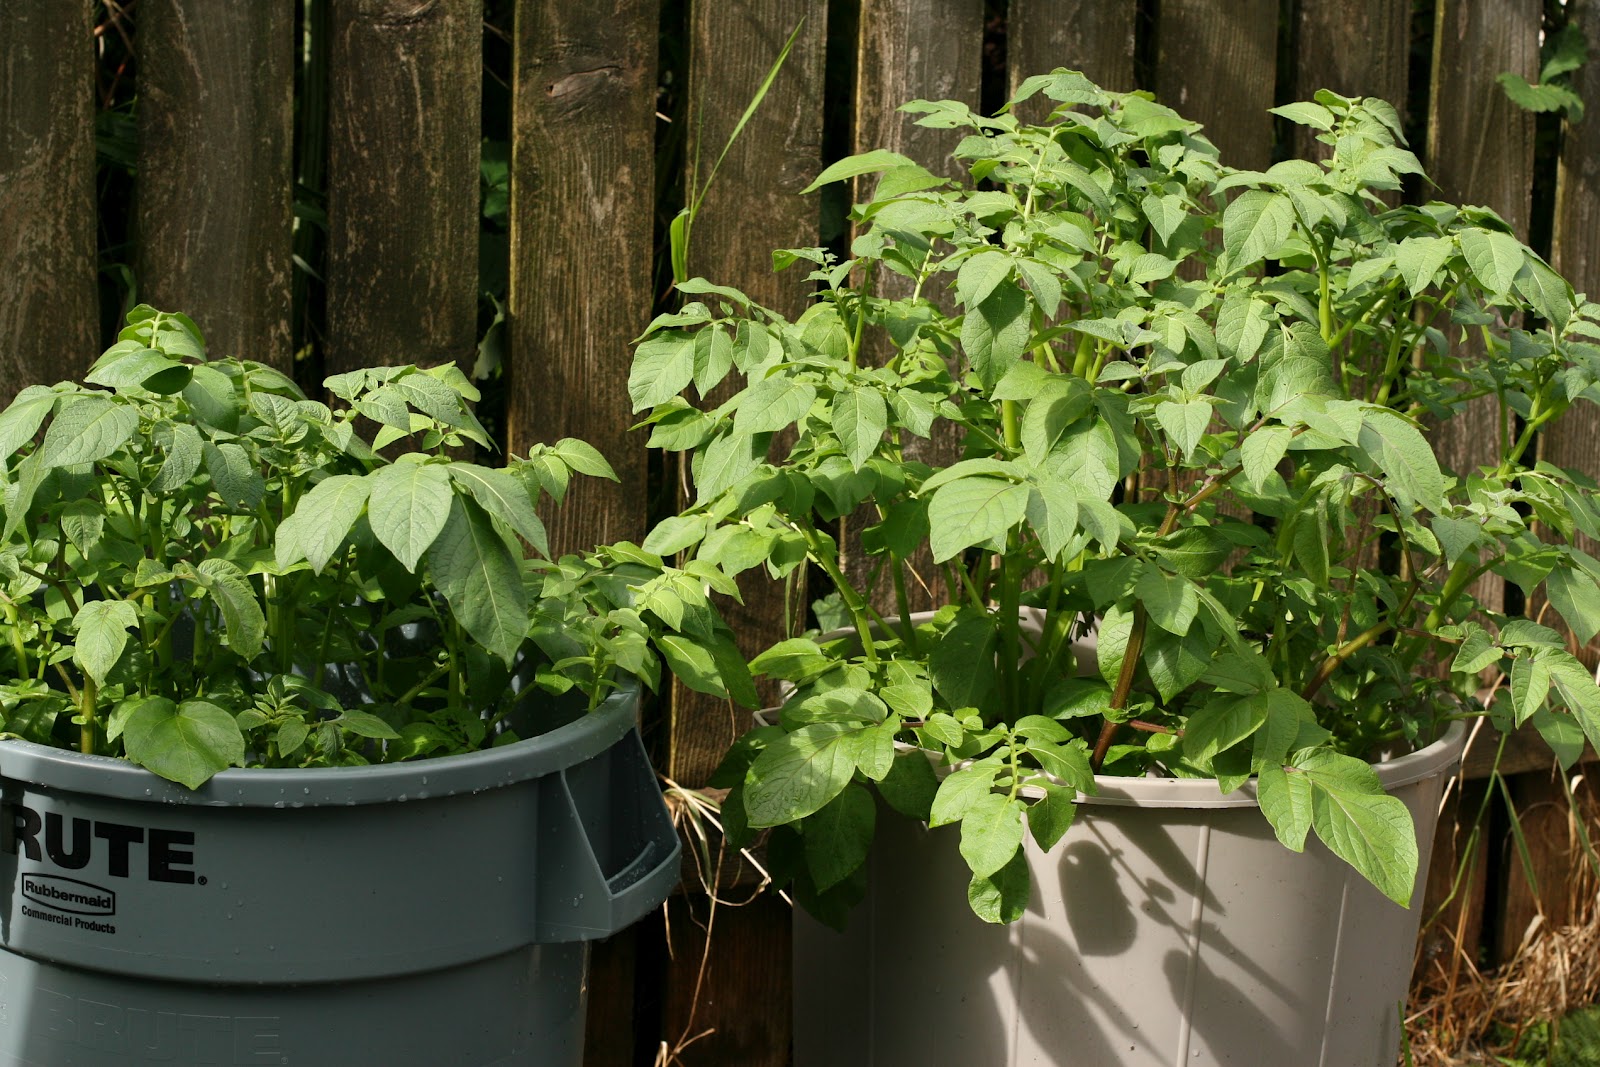
We have been growing potatoes in 2 very old plastic trash 
cans for so many years they are 
falling apart. 

This spring I bought several new plastic cans.
Cheap ones (by today's standards).
They were deeper, heavier and as I thought built to 
last many potato harvests down the road.

WHAT A SHOCK!

Look at what is happening.


The light blue/gray can is an old one, it is thin and lots of light comes through it.
 The potatoes are growing as they should be.

The black or very dark green can in the back ground was planted the same day as 
all three cans were.  It was perhaps warmer being black.  However it is not
growing well at all.  The wall are thick and didn't allow the sun through in the early 
growing of the potatoes.

The lighter green can is new also, in the foreground, the plants are so small
they are still not growing well. 

 Thick plastic not good I'm thinking. 

This is the can that is not growing well they are barely 1/3 the way up the can. Sad!


Oh look at this gray can, my very oldest one. 
it is growing so very well!  Oh to have more old cans.  
All potatoes were planted the same day and in the same way!

My suggestion, keep them in a warm place.  I've moved all the
cans to the cement patio in the sun.. They still won't grow as well.

Maybe if you beat me to the local garage sells you'll find 
some old thin plastic cans.  

Once again  SAD

OCT 2012 UPDATE

All the potatoes are harvested.  Some very nice ones but clearly 
the heavy trash cans had much smaller potatoes.   It's good to hear
Kevin has had success near warm stones and metal containers.


My Helpers

How to eat from a home garden


When you consider price, work, weather, bugs etc
 gardening can seem very un-necessary.

Why would I be so driven to grow my own food when I can buy it in the store?


1) The taste of home grown food can not in any way compare to the store bought
2) When it comes to variety home grown can beat store bought hands down
3) fresh, nothing can be fresher than a pre-dinner walk to gather your supplies for dinner.
4) harvest when the food is perfectly ripe has to be my favorite reason home gardens are wonderful.

In thinking about the above list let me add some things for you to consider.  

We do not need to let our home grown plants
 get the size of store bought. 


 We are so lucky to be able to harvest our food when it is young and tasty.

If you wait for your produce to get as large as store bought
 you'll miss out on the yummy taste that is possible.

Here are some examples:
Peas as soon as formed are better than large peas
lettuce cut from the outside of a plant, leaving the plant to keep growing is tender and sweet
Bush beans are wonderful when only 4 inches long
Carrots are sweet and tasty when not too old
Spinach collected a few small leaves at a time make perfectly heavenly salads
Beet greens taken young are very tender as is kale and chard leaves.
Zucchini is perfect at 6 inches long
beets that are the size of golf ball roast in the oven so nicely


Some plants that do need more time to be fully grown are
Potatoes
Tomatoes,
Peppers
winter squash
eggplant
Garlic
storing onions

They each have signs that show they are ready to eat.
Potatoes need to bloom and die down

Garlic needs to have some warmth to form a bulb 
and then they will dry to about 4 leaves left before harvest

Peppers can get bigger before harvest and be wonderful and juicy

Eggplant need some bulk to be good

Onions can be harvested small, med or large.  They need some dry weather and
the greens to die back....press them over when the onions decide to flower.  

I think we all agree that tomatoes are better when they get red, 
or orange or yellow, anything
except green!


A very good habit to make is to walk through the garden every 
day when planning your evening meal.  
You will learn to eat from all that is in your home garden and become a garden Gourmet.

Saturday, June 16, 2012

How to grow and harvest lettuce in the PNW

Another post on eating what you grow at it's very best

Lettuce

It is really wonderful here in the Pacific Northwest
The damp weather keeps the lettuce from getting bitter.
The long cool late Springs and summers keeps our lettuce 
from bolting to seed.  We really do get a long season 
for growing lettuce.  Yum Yum

You may do your lettuce differently here.


I plant them closely
I collect leaves from the bottom of all the plants
that usually makes one salad bowl in our house. 

Lettuce will keep growing and making more leaves. 

I don't replant lettuce until my fall/winter lettuce types go in the ground. 
I just keep harvesting off the plants I have. 

I stepped out between rain showers 
to collect the photos in this posting. 

Rain as hard as we have been getting beats
lettuce down.  I have my salad box covered for now.

You can see the spaces where I have harvested leaves off the
plants.  You couldn't see the dirt anywhere in the
box a couple of days ago.

Be sure and clean off any leaves that go yellow, limp or have too many bug nibbles.
Keeping the plants looking healthy makes me want to collect and enjoy of greens.

Lettuce is wonderful for taco/s, burritos, salads of course and sandwiches. 
I plant chives and beets and parsley in my salad box also. 

HINT:  regular watering will keep the lettuce from being bitter.
If it warms up you'll need to move your salad table into the shade
and keep it moist.

Enjoy!  I do

Some of my favorite types of lettuce to plant:
I like Ed Humes Gourmet blend it has Buttercrunch, Grand Rapids, Red Sails Parris Island Romaine
Territorial seed carries a nice mix: London Springs and I recommend their Super Gourmet salad blend. 

Because lettuce grows here so easily I put lots of color in my lettuce.  My favorites change here are some that never change: Trouts back, Devils tongue, Italienischer, green Deer Tongue, 

Tuesday, May 15, 2012

questions about feeding the soil

I'm getting some questions
 about "how much to feed the soil"

This is a question that has plagued us for ever.  The old timers
seem to have a sense of what the soil needs more of, the scientist
are sure they know but what do you put in the Square foot garden?

First off compost around here is NOT what is used to be.  Some times
barely composted and often so wet I'm sure it came from our
 own water soaked world.  Often they are full of peat moss.

The Square foot idea is one of compost not fertilizer.
 But here in the Pacific Northwest some years
 we'd wash away
everything our
soil had to give a growing plant.  

If your compost seems full of peat moss,
 if it seems overly soaked, 
if it is full of large chunks of wood pieces 
or other un-composted materials you should
 consider adding some
 supplements to your mels mix. 

Oh slap me square foot traditionalist!  I began French
intensive gardening when it hit the San Fransisco Bay area in the early 1970's
and I have a right to know when something needs correction. 

Second I must say that less is more.
 If you over feed your soil
you will cause all kinds of issues.
 Most not good.
 So please 
remember less is more. 


In class we talked about our soil needs being contained in
Kelp meal
Lime (ag lime/ dolomite mix)
seed meal
bone meal/phosphate rock
 Opt. Fish meal

Newly planted seeds don't need food
Plants in a full growing season NEED food
Plants with ripening food don't need food

You can side dress or make teas etc to adjust for these different 
growing seasons.

BIG HINT:  If you just want to add to your square foot box 
when working your soil in the spring,
 and you copied the recipe from the chalk board,
add 1 to 2 gallons of "the recipe"per each 100 square feet of your box over
the top of your garden, spread evenly. 

 Just work this into the top couple of inches of your box. 

Oh and I found Dr. Earth all purpose fertilizer has a nice
group of just what I want to add to my garden and
 I didn't even have
to mix it up! 


Sunday, May 13, 2012

A step by step for mixing soil

For all my new gardeners who are now at the point of mixing your soil
Here is the step by step (it is in the right bar but hard to follow) It's fun
you burn calories and grow great things when it's all done!


Wish I could come over to your garden and help you directly. 
If I can't try following my step by step method:

 1. lay out your tarp.

 2 open one bag of compost and spread thinly across your tarp.

 3. tap out any lumps

 4. open another bag of compost and spread it over the first taping out lumps. 

 5. add your peat moss to the tarp and spread it over the compost, once again tapping out the lumps, and it does have lumps.  Try not to leave peat moss clods...They need to mix in nicely


 6. Carefully grab an end of the tarp and lift it up and help the mix on the tarp roll into the center. Go slowly and watch as the ingredients begin to mix together.


 7 When mixing move from both ends and the two sides. When you can't move the piled up soil any more spread it thinly over the tarp again.

 8. Add in the rest of the compost and mix completely by lifting the tarp and letting 
the mix roll over it's self .

 9. add in vermiculite, spread gently over the whole tarp. We don't want to brake this up any more than we have to. Gently move the tarp back forward to mix and gently spread it over the tarp thinly and mix again.Spread the mix out across the tarp again.

 10 When it all looks like salt and pepper it's ready. Add it to your garden box.

 Salt and pepper look


I can mix 4 cubic feet of compost, 4 cubic feet or peat moss and 4 cubic feet of Vermiculite in one batch. 

It is Good to have left over soil. 
 Put it back in a compost bag or a trash can and every time you pull a used up plant out you stir in a can of new soil back in.  Later you will only add in compost each time you re-plant a square you must add in food for the next plant.  It's so easy. 


Tuesday, May 8, 2012

Setting up potato cans used last year

You may have already started your potatoes that's great!

If you didn't get any bad diseases with your potato growing last year,
let's use that soil mix again.


Here is what you need to know.

Tomatoes, eggplant, corn and potatoes are very big feeders
They really use up what is in your soil mix.
So Boost it.
Add new compost and for good measure
add some bone meal.
PLEASE PUT A MASK ON!

A Veggie food with a larger middle number is welcome also

As you add soil to the potato can be sure to water 
to the bottom and continue to add the enriched soil

It's just that easy!

Enjoy